Training Schedule
Training for Infrared and EMT professionals world-wide.

One of the topics that we cover extensively in our Level 1 - Thermographic Applications training courses is the three modes of heat transfer: convection, conduction, and radiation. In this month’s tip we are going to discuss convection, particularly detecting air leakage in buildings with IR. As thermographers we have to understand that an IR camera cannot ‘see’ or detect air (if that were the case, we would not be able to see anything other than our atmosphere with our cameras). Air is highly transmissive to IR radiation. So, how could we detect air leakage in a building with an IR camera? The answer is to pay attention to the effects of the air movement . For example, if cold air is being blown on a warm surface, it would cool off an area of that surface. If warm air is being blown on a cool surface it would warm up an area of that surface. But what happens if air is being forced across a surface and both the air and the surface have the exact same temperature? According to the Newton’s law of cooling:
(Q = h • ΔT • A)
where
If there is no ΔT between the air and the surface (ΔT=0), there will be no heat transfer by convection. So, in that particular case the surface will remain at the same temperature (and the IR camera will not be able to ‘see’ or detect any convection or possible air leakage). It is absolutely necessary for us to have a temperature difference (ΔT) between the inside and the outside temperature of a building for us to detect air leakage. The ASTM Standard 1186 suggests a 5°C (9°F) inside to outside ΔT to inspect for air leakage. In this tip we will not discuss how to force a pressure difference with a building to detect air leakages (like for example using a blowing door), so let us assume that there is already some natural air leakage going on, due to either wind-blown pressure differences or the natural stack effect of a structure (warm air rises, creating a low pressure zone at the bottom and a high pressure zone at the top) how it would appear to the IR camera? Let us pay attention to the IR images below:
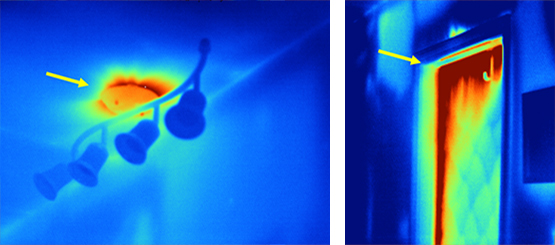
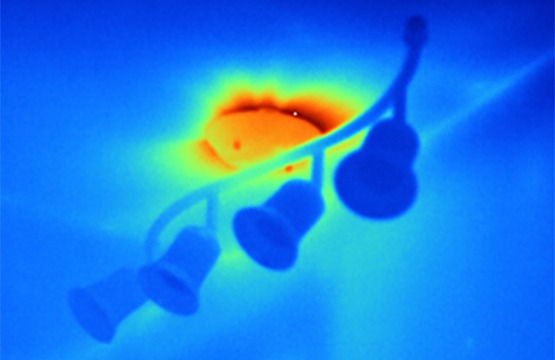
In the images above we can detect a thermal patter that ‘suggests’ that warm air is infiltrating, heating up surfaces that it comes in contact with.
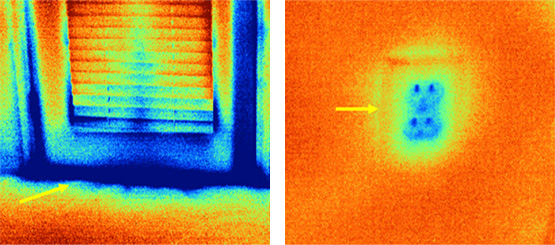
In these images we can detect a thermal pattern that ‘suggests’ that cool air is cooling the surfaces it comes in contact with. Again, we are not seeing the air with our IR camera. We are detecting the effects of air on surfaces that it comes in contact with. The air that surrounds us is one of the few materials that are transmissive to infrared radiation. Because of this, we cannot measure the temperature of the air with an IR camera. We must pay attention to the telltale thermal patterns that show us the effects of the air to find air leakage pathways.
Some air exchange is necessary in a house or a building. Too little air exchange can cause a myriad of problems including occupant health, odor control, and moisture issues. However, if a building has far too much air exchange occurring it may result in increased energy costs, structural damage, personal health issues, and lack of moisture control. IR is a wonderful tool for detecting air leakage pathways if we have the right conditions and we know what to look for. Proper training can go a long way towards providing you with the knowledge necessary to perform a successful air leakage inspection and the skills needed recognize problems. Remember to look for the effects of air leakage during a building inspection and keep Thinking Thermally!


