Training Schedule
Training for Infrared and EMT professionals world-wide.

Cleaning your infrared camera’s lens is a rather simple procedure if you understand the seriousness of what you are doing as well as the potential consequences of doing it incorrectly.
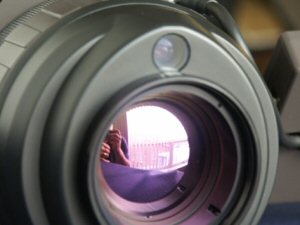 First, know that the lens of an IR camera can be very expensive. Replacement or repair can cost hundreds to thousands of dollars depending on the lens and exact camera model. The anti-reflection coatings used on both the inside and outside surface of the lens is a very expensive part of the lens assembly. This coating is critical to both the performance and radiometric capabilities of the infrared system.
A student, new to The Snell Group but not new to infrared, shared a story in class of learning the hard way about cleaning his infrared camera lens. The student wiped/rubbed the lens of his camera with a handkerchief every time he took it out of the case as well as when he put it away in the case. His boss had told him to keep the lens clean, and while he thought he was doing just that, he actually wiped off the entire anti-reflection coating. This is a costly mistake you can avoid.
If your infrared camera came with a microfiber cleaning cloth, use according to directions. They tend to collect dust, dirt and oils. If not properly washed and stored they could act like sandpaper to the coatings on your lens. Use with caution as their intent may be for the cleaning of an LCD screen or viewfinder.
There is one rule of thumb to remember with IR lenses…clean the lens only when it needs cleaning! If the lens is dusty, blow it off with a rubber bulb syringe/brush or use a photo brush (usually made of camel’s hair) to gently brush the dust away.
If the lens has something stuck on it, then you must use more aggressive methods. The best and safest procedure is to use disposable optical grade lens tissue and a solvent approved by your camera manufacturer*. Always apply a drop or two of the solvent to the cleaning tissue first (never drip it directly on to the lens) and then make one gentle swipe across the dirty area, pausing to allow the area to moisten or soften. Throw the tissue away. If there is still some material left on the lens repeat the previous step.
Often after the foreign material is removed there may be a few streaks. The best way we’ve found to remove those is to use a fresh dry sheet of disposable lens tissue and condensed water vapor (i.e. breathe on the lens). Gently wiping the surface should leave the lens clean and streak free.
Please Note: Recommended cleaning solutions vary from manufacturer to manufacturer. Be sure to contact your camera sales rep or call the manufacturer directly and find out which cleaning solution is right for your model camera.


